

That old, failing window tint has to go before you can even think about upgrading to a modern, energy-efficient film. This is a project many homeowners and businesses right here in the Chattanooga area eventually face, and it's the critical first step toward a more comfortable and cost-effective property.
Your Guide to Flawless Window Tint Removal

Most people don't realize residential and commercial window film has an expiration date, especially older products. Years of getting blasted by the sun and dealing with Tennessee's temperature swings eventually break down the materials. When that happens, you'll start to see some pretty obvious problems.
Telltale Signs of Worn-Out Tint
You'll know it's time for a change when your windows start showing the classic symptoms of film failure. These signs aren't just ugly; they're a clear signal that the tint isn't providing the UV protection or heat rejection it used to.
Keep an eye out for these common issues:
- Bubbling and Blistering: This is what happens when air or moisture gets trapped between the film and the glass. It creates that awful, bumpy look.
- A Hazy Purple Glare: See a weird purple haze? That's the signature of cheap, dyed films breaking down after years of UV exposure.
- Peeling Edges: The adhesive gives up the ghost, usually starting at the corners and edges, causing the film to curl right off the glass.
Back in the early 2000s, when residential tinting really took off, a lot of folks were sold cheap films that promised the world. By 2010, however, industry reports showed that up to 40% of those installations were failing way too early. Poor adhesive and constant UV exposure meant some were showing problems in as little as 3-5 years. You can learn more about the history of window film removal from Window Film Depot.
Preparing for a Clean Slate
Getting that old film off properly is non-negotiable if you want a perfect new installation. Just trying to apply new tint over an old, damaged layer is a recipe for disaster. You'll end up with more bubbles, bad adhesion, and you'll absolutely void the warranty on your new film.
Think of it this way: you wouldn't paint a wall without sanding and priming it first. The same principle applies here. A perfectly clean glass surface is the only foundation for a lasting, high-performance window film installation.
As we head into the winter season here in Tennessee, it’s a great time to tackle this project. Removing old, ineffective film now gets your home or business ready for a modern replacement that can help keep the heat in during the winter, lowering those energy bills when it counts. This guide will walk you through the trusted DIY methods and help you figure out when it’s smarter to just call a pro.
Gathering Your Tools for a Clean Removal
Before you even think about picking at that first corner of old window film, let's talk prep. Trust me, spending a few minutes gathering the right tools is the secret to avoiding a sticky, frustrating mess and, worse, a scratched window. This isn't just about grabbing a razor blade; it's about setting yourself up for a smooth, clean job.
It really helps to know what you're up against. I've seen older films, especially ones installed on Chattanooga homes a decade or more ago, that used adhesives that get incredibly brittle. They'll chip off in a million tiny pieces. Other times, you're left with a thick, gummy layer of glue that just won't quit.
Prepping for Success: Tools and Supplies
To tackle this project like a pro, you'll need a few key items. Most are probably already in your house, but a couple of specialized tools will make a world of difference. When you're looking at things like a heat gun or steamer, understanding the practical differences between cordless vs. corded tools can help you decide what's best for moving around your property without being tethered to an outlet.
Here's a quick look at the essential tools and supplies you'll want to have ready before you get started. Having everything laid out and within arm's reach makes the whole process go much more smoothly.
Essential Tools and Supplies for DIY Window Tint Removal
| Tool/Supply | Primary Use | Recommended For |
|---|---|---|
| Heat Gun or Steamer | Softening adhesive for easy peeling | Virtually all removal methods |
| Plastic Scraper or Razor Blade | Lifting film edges & scraping residue | All methods, especially with stubborn adhesive |
| Spray Bottles | Applying soapy water or cleaning solutions | All methods for lubrication and cleaning |
| Dish Soap & Water | Lubricating the glass for scraping | All methods as a primary removal agent |
| Rubbing Alcohol or Adhesive Remover | Dissolving stubborn glue residue | Post-peel cleanup |
| Safety Glasses & Gloves | Protecting eyes and hands | All methods, especially with chemicals |
| Old Towels / Plastic Sheeting | Protecting sills, floors, and furniture | Every single project, no exceptions! |
| Squeegee & Microfiber Cloths | Final glass cleaning and polishing | The final step to a streak-free finish |
Gathering these items before you start peeling ensures you won't have to scramble mid-project, which is when mistakes and messes tend to happen.
Setting Up Your Workspace
With your tools ready, the next step is prepping the area around the window. This isn't just about being tidy; it's about preventing water damage to your home or office and letting you work without interruption.
Protecting your property is just as important as protecting the window itself. A few minutes of prep can save you from costly repairs to flooring or window frames down the road.
Lay down your old towels or a plastic sheet on the floor, making sure to tuck it right up against the window sill. If you have blinds or curtains, take them down. Getting them out of the way gives you clear access and stops them from getting soaked or covered in sticky residue. Having everything you need within arm's reach means you can focus on the task at hand, making the entire process of removing tint from your house windows safer and a whole lot easier.
Time-Tested Methods for Removing Old Window Film
Alright, you've got your space prepped and your tools laid out. Now for the main event: getting that old, failing film off your glass for good. There isn't just one way to do this, and honestly, the best technique often comes down to the age of the film, the type of adhesive used, and even the weather. We're going to walk through three solid methods that we use all the time on homes and businesses in the Chattanooga area.
The whole point is to loosen the adhesive's grip without resorting to brute force. Pushing too hard is a surefire way to get scratches or, even worse, a cracked pane. Each of these methods—heat, steam, or good old soapy water—is about gently convincing the film to let go. This is about working smarter, not harder.
This little decision tree can help you figure out the best place to start.
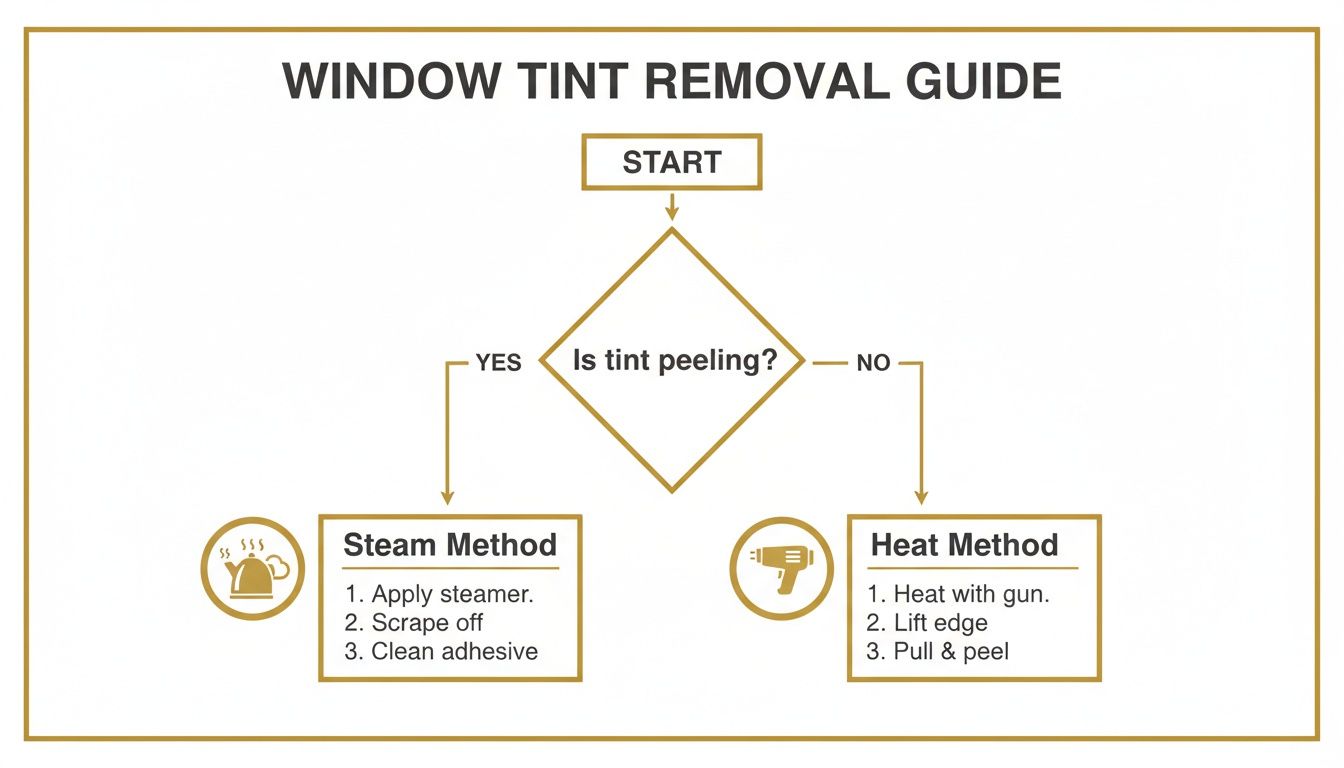
As you can see, the condition of the tint itself is your biggest clue. Let it guide you to the right method, and you'll save yourself a lot of headache right from the start.
The Heat Gun Method For Intact Film
If your window film is still mostly in one piece but it's looking discolored or hazy, a heat gun (or a powerful hair dryer in a pinch) is your best friend. Heat works by softening the adhesive, weakening its bond so you can peel the film away in large, satisfying sheets. It’s a clean and relatively dry approach to the job.
The real trick is applying consistent, even heat. Hold the heat gun about 6-8 inches from the glass and keep it moving in a slow, sweeping motion. Whatever you do, don't let it linger in one spot. Concentrating too much heat can create thermal shock and crack the glass—it's rare, but it's a real risk, especially on older double-pane windows.
Start at a top corner. As you warm up the area, you’ll see the film start to lift just a bit. Once it’s warm to the touch (not scorching hot!), use a plastic scraper or your fingernail to carefully get under the edge. From there, start pulling the film down at a 45-degree angle, applying heat just ahead of where you’re peeling.
Pro Tip: Go slow. If you pull too fast, you're going to tear the film into a million frustrating little pieces or leave all the sticky stuff behind on the glass. Patience is everything here.
This technique is perfect for films that haven't started to peel or bubble on their own yet. The controlled heat is often just enough to break that stubborn adhesive's hold without making a watery mess.
The Steam Method For Peeling and Brittle Tint
Is your film already peeling, bubbling, or so old it's become brittle and cracked? A garment steamer is an absolute game-changer. Steam is fantastic because it delivers both heat and moisture, which work together to penetrate and dissolve old, stubborn adhesive much more gently than dry heat can. This is our go-to for delicate or aged windows.
The process is a lot like using a heat gun, just with a bit more moisture. Hold the steamer head an inch or two from the glass, working in small sections. The hot steam will quickly soften both the film and the glue underneath.
You can then start peeling from any loose edge, and you'll notice the film comes away with much less of a fight. Because steam is so good at liquefying the adhesive, you’ll find that most of the sticky residue comes off with the film. That saves a ton of cleanup time later.
This is an especially great choice for a project during a Chattanooga winter. The steam keeps the adhesive pliable inside a warm room; trying this in the cold just makes the glue hard and brittle, complicating everything.
This method also works wonders on the cheap, low-quality films that flooded the market years ago. After 2018, we saw a huge boom in removals. Homeowners were promised 30% energy savings, but the cheap imports started failing after just four years—peeling 60% more often than quality films. In fact, 2023 stats show that 75% of homes that re-tinted hit their ROI in three years, but only after removing old, inefficient layers. You can dig into more of these window tinting statistics on Total Protection Films.
The Simple Soap-and-Scrape Technique
What if you don’t own a heat gun or a steamer? No problem. You can still get this done with a simple mix of soapy water and some elbow grease. This is the most accessible method of all, relying on lubrication to help a scraper slide under the film and lift it off the glass.
First, mix up your solution. A generous squirt of dish soap in a spray bottle filled with warm water is all you need.
Next, you need to score the film. With a sharp utility knife and a very light touch, make a few crisscross cuts across the film. I can't stress this enough: be extremely careful not to press too hard and scratch the glass. You just want to break the film’s surface so the soapy water can get underneath and attack the adhesive.
Now, drench the entire window, letting the solution seep into your score lines. Let it sit for 10-15 minutes, re-spraying every few minutes to keep it wet. Finally, using a plastic scraper held at a shallow angle, start pushing and lifting the film. It'll come off in smaller pieces, but the soapy water will prevent scratches and help dissolve the glue as you go. This method definitely requires the most patience, but it's a solid, low-cost way to get the job done.
Tackling Stubborn Adhesive and Common Problems
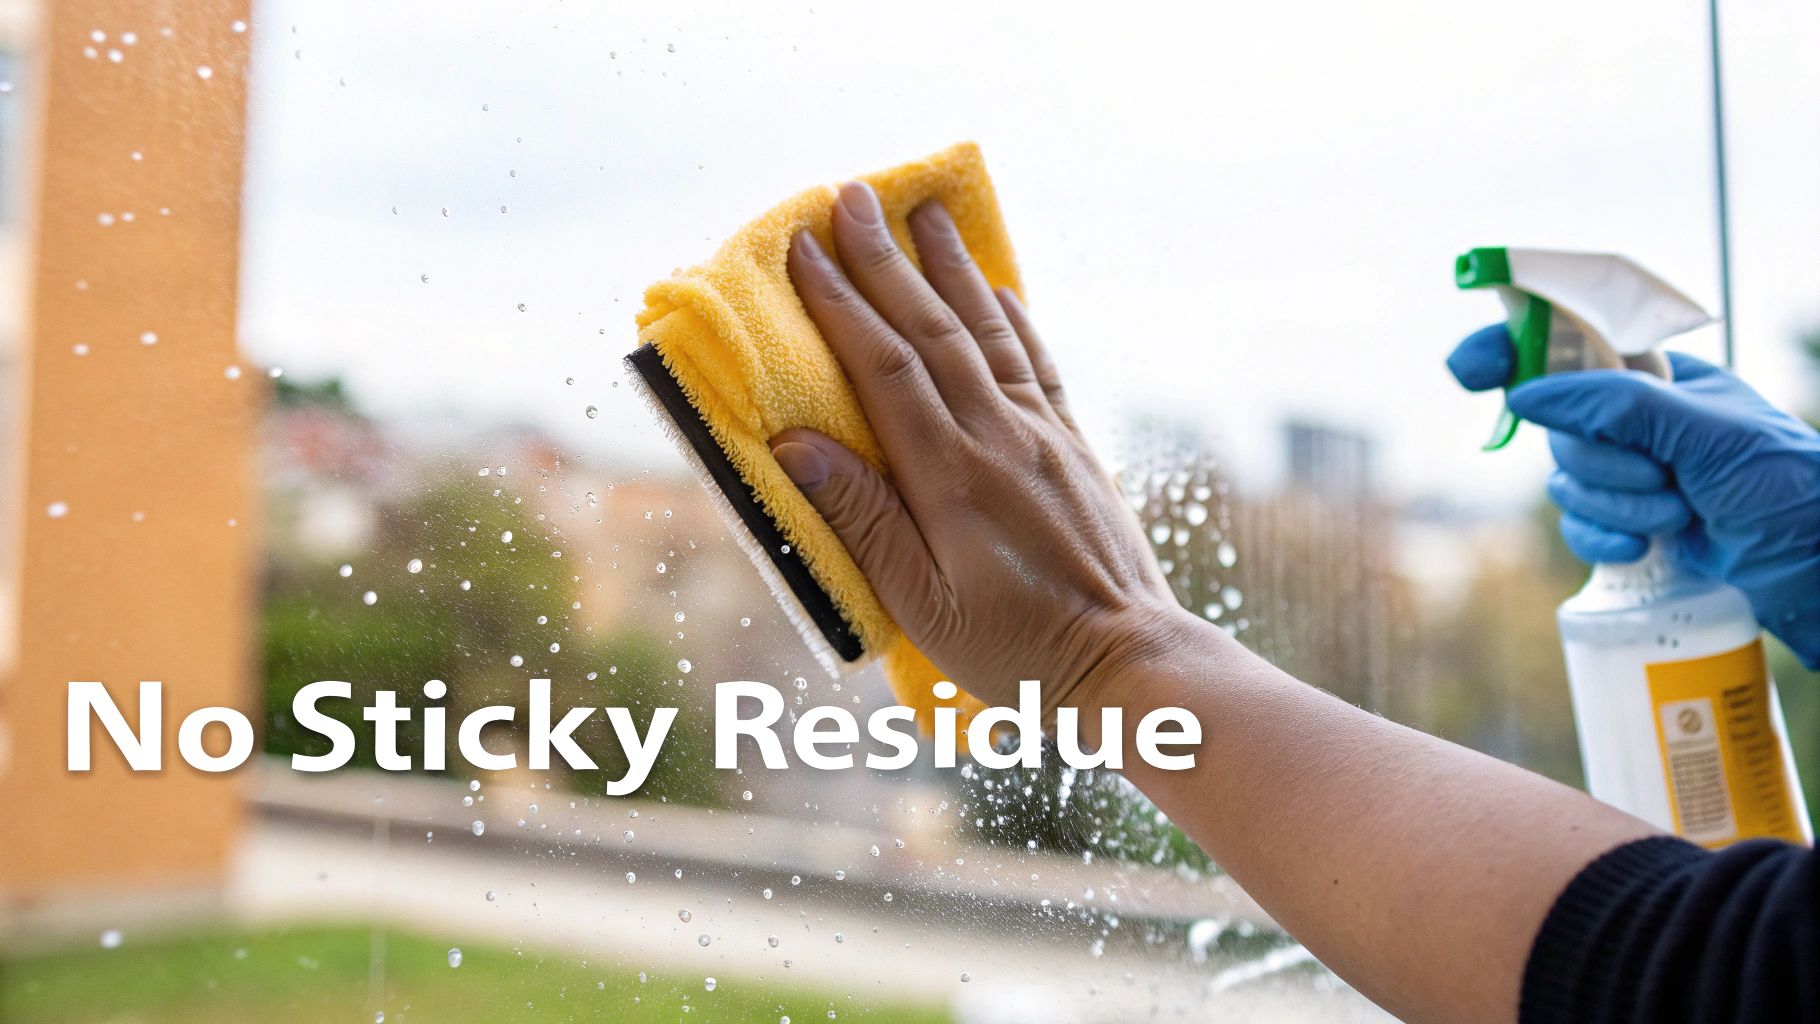
So, you got the old film off. Great! But now you're staring at a sticky, hazy mess of old glue. Don't worry, this is the most common hurdle in any DIY tint removal job, and it’s completely manageable.
Getting that leftover adhesive off is what makes the difference between a frustrating afternoon and a perfectly clear window. The trick isn't brute force; it's about dissolving the glue so it wipes away easily. A little patience here will give you that flawless finish you're after.
Dissolving That Stubborn Glue Residue
Think of that sticky layer as the ghost of the old film. Trying to scrape it off dry will get you nowhere fast and you'll likely scratch the glass in the process. You need a solvent to break down the glue's bond, turning that tacky nightmare into a liquid you can simply wipe off.
And you don't necessarily need harsh chemicals. You've probably got some powerful adhesive-fighters in your house right now.
A few of our go-to options for that sticky mess include:
- Warm, Soapy Water: The same stuff you used to peel the film can work here too. Just spray it on thick, let it sit for a few minutes, and then go at it with your plastic scraper.
- Rubbing Alcohol: Isopropyl alcohol is fantastic at cutting through many types of adhesive. Soak a rag with it, press the rag against the glue to let it penetrate, then start scraping.
- White Vinegar: That mild acid in vinegar is a champ at breaking down sticky stuff. A 50/50 mix with warm water in a spray bottle is a great natural alternative.
- Commercial Adhesive Removers: For that really baked-on, ancient glue, a dedicated product like Goo Gone is your heavy hitter. Just make sure to follow the directions on the bottle.
Here's the key takeaway, no matter what you use: apply your solution, wait, then scrape. Letting the liquid work for 5-10 minutes is way more effective than just scraping like a maniac. It saves you from scratching the glass and saves your arm a lot of grief.
What to Do When Film Breaks into a Million Pieces
Ever start peeling something and it just shatters into tiny, brittle shards? This happens all the time with old window film, especially on windows that have soaked up years of direct Chattanooga sun. The UV rays have literally cooked the film, destroying its integrity.
If this happens to you, stop picking at it. You’ll go crazy trying to get every little piece. It's a clear signal that you need to change your game plan.
Your best friend in this situation is a steamer. The heat and moisture work together to soften those brittle bits and liquefy the old glue holding them on. Once it's steamed, you can use a wide scraper to push the whole mess off in a manageable sludge. No more picking at tiny flakes.
When the Film Absolutely Won't Budge
Once in a while, you'll run into a window where the film seems to have fused with the glass. You can't find an edge, it laughs at your heat gun, and it simply refuses to lift. This is common with older, thick security films or films installed with super-aggressive adhesives.
For this, you need a combination attack. First, very carefully score the surface of the film with a sharp utility knife. I'm talking extremely light pressure—you just want to break the film's surface, not touch the glass. These tiny cuts create channels for your solvent to get in.
Next, spray a heavy coat of ammonia-based window cleaner or your adhesive remover onto the scored film. Immediately cover the entire window with plastic wrap, taping it down at the edges. This traps the liquid and fumes, forcing them to penetrate the film and attack the adhesive. Let it sit for at least 30-60 minutes. After this "ammonia soak," the film should be much more willing to peel off.
When to Call a Professional for Window Tint Removal
While the DIY methods we've covered can absolutely work, they all demand a serious amount of time, patience, and a steady hand. Let's be honest, sometimes the smartest move any homeowner in the Chattanooga area can make is to step back and let an expert handle it. Knowing when a project crosses the line from a weekend task to a potential disaster can save you a world of frustration and costly mistakes.
Knowing your limits is a strength. It's crucial to understand which common DIY jobs you shouldn't attempt yourself, and window tint removal often lands squarely in that category—especially for larger projects.
The Value of Experience and Specialized Tools
Why hire a pro? It's not just about speed. We come equipped with specialized tools that make the process safer and far more efficient. We're talking about industrial-grade steamers and specific solvents that dissolve stubborn, baked-on adhesives in a way household products simply can't match. This expertise is your best defense against the common mishaps that can permanently damage your windows.
Here are a few nightmares a professional helps you avoid:
- Deep Glass Scratches: One slip of a metal razor blade can leave a permanent scratch that catches the light just right forever. It's a painful reminder.
- Thermal Shock: Using a heat gun incorrectly, especially on older double-pane units, can cause the glass to crack from the rapid temperature change.
- Damaged Window Seals: Scraping too aggressively or using the wrong chemicals can easily compromise the seals around your glass, leading to foggy windows and lost insulation.
A professional removal isn't just about peeling off old film. It’s about perfectly prepping the glass for what's next, ensuring a flawless foundation for a new, high-performance installation that will look great and last for years.
When Professional Help Is a Must
Some situations pretty much demand a call to a professional. If you're looking at a large-scale project, like an entire house or a commercial storefront, the sheer volume of work makes a DIY approach completely impractical. The dozens of hours you'd spend are better used elsewhere.
You should definitely consider calling a pro if:
- You have high, hard-to-reach windows that would require sketchy ladder work and create a safety risk.
- You're dealing with old, baked-on film that has become brittle and shatters into a million tiny, frustrating pieces the second you touch it.
- Your windows are made of specialty glass, like tempered or coated glass, which requires very specific handling to avoid damage.
In the end, hiring a professional gives you peace of mind. For those in the Chattanooga area looking to not only remove old, failing film but also upgrade to something better, you might be interested in our expert window film installation services near you. An expert ensures the job is done right the first time, protecting your investment and setting the stage for a more comfortable and energy-efficient home, especially as we head into the winter months.
Give Your Windows a Winter-Ready Upgrade
With that old, failing film gone, you're looking at a perfectly clean slate. It's the best possible time to think about what's next for your windows, especially with another Chattanooga winter right around the corner.
So many people think window film is just about blocking the brutal summer sun, but that's only half the story with today's advanced materials. A high-quality window film is a year-round workhorse, putting in just as much effort in December as it does in July.
How Modern Films Keep You Cozy in Winter
Forget those old-school, dark tints. Modern nano-ceramic films are engineered from the ground up for all-season performance. When the temperature drops, these films are your best friend, helping your home hang on to precious heat.
The very same technology that kicks solar heat to the curb in the summer works in reverse during winter. It acts like an invisible blanket, reflecting your home's heat back into the room instead of letting it escape through the glass. Your furnace won't have to cycle on as often, and you'll feel the difference on your energy bills.
This isn't just about feeling more comfortable; it's a smart financial move. Upgrading after you've cleared away the old tint is an investment that actually starts paying you back. You can see how the latest films make a huge impact on your home's efficiency by exploring different window films for energy savings.
A Long-Term Investment in Your Chattanooga Property
Putting the right film on your windows is far more than a quick fix. You're making a long-term improvement that boosts the value, comfort, and efficiency of your home.
For homeowners within a 45 to 60-mile radius of Chattanooga, getting a professional installation is the best way to ensure your home is ready for whatever the Tennessee seasons throw at it. We'd love to show you how the right film can make a world of difference this winter—and for many more to come.
Your Top Questions About Window Tint Removal
Got questions about getting that old, failing film off your windows? You're not alone. Here are the straightforward, no-nonsense answers I give homeowners and business managers every day. Getting this part right is the first step to upgrading your property and getting it ready for a fresh, high-performance film.
How Long Does It Take to Remove Tint from House Windows?
Honestly, it really depends on what we're up against. The film's age, the size of the window, and the method you use are the big three factors. For a DIYer tackling a single, standard-sized residential window, you could easily be looking at one to two hours of careful work.
A professional crew, on the other hand, can make quick work of it. We often clear an entire home or a commercial space in just a few hours. We've got the specialized equipment and have fine-tuned our techniques over the years to speed things up dramatically, saving you from giving up an entire weekend.
Can Removing Window Tint Damage My Windows?
Yes, absolutely. There's a real risk of damage if you don't know what you're doing. The most common mistake I see is someone taking a metal razor blade to the glass—it's a surefire way to leave permanent, ugly scratches.
Another big one is focusing a heat gun on one spot for too long. That can cause thermal shock and crack the entire pane. It’s why we always preach using plastic scrapers and keeping any heat source in constant, steady motion. When you hire an insured professional, you completely remove that risk from your plate.
The most important thing to remember is this: old film has to be 100% removed before new tint can go on. Slapping new film over a failing layer is a recipe for disaster. You'll get bubbles, it will look terrible, and it will immediately void the warranty on your brand-new, high-performance film. A perfectly clean surface is non-negotiable.
If you're curious about why your old film might be failing in the first place, our guide on how long window tint should last has some great information.
Ready to upgrade your home or business with a flawless, professional installation? Solar Sentinel Window Films & Tinting provides expert tint removal and installation services throughout the Chattanooga area. Contact us today for a free, no-obligation quote and discover the difference a professional touch can make.